Monday 27 July 2009

July Daring Bakers: Milano Cookies

Milano Cookies

The July Daring Bakers' challenge was hosted by Nicole at Sweet Tooth. She chose Chocolate Covered Marshmallow Cookies and Milan Cookies from pastry chef Gale Gand of the Food Network.

I chose to do the Milano Cookies as they looked like just the sort of thing I would enjoy with a cup of coffee in the morning. I actually had intended to give the mallows a go as well but I ran out of time with being on holidays and, well, I didn't want to make up huge quantities of mallows when I didn't envisage anyone but ourselves being about to eat them (the freezer is brimming over with food at the minute). The recipe makes a HUGE quantity - when it says 3 dozen it is at least 3 dozen sandwiched cookies.

I was really pleased with these the day I made them. The biscuit was delicious - light and crispy, and you can never go wrong with a ganache filling. However, these didn't store for me. I put them in an airtight container in the fridge and the next morning they were soft. I don't know if it was because I put them in the fridge (which I don't normally do - I don't know what posessed me) or if my container wasn't airtight or if it was just the cookies themselves. I do know a few other daring bakers experienced the same thing.

But I stuck them in the freezer anyway, as I didn't want to waste them, and, hey, they taste good soft!! Not as good but I'm currently having one each morning with my coffee. They make nice dunking biscuits.

I haven't given up on these yet. They were really delicious if I could just find out how to keep them crispy. And they would be great for a party or other event where you want a large quantity of biscuits. I'll work on it!

Milano Cookies

Serves: about 3 dozen cookies

Method:

Biscuit:
12 tablespoons (170grams/ 6 oz) unsalted butter, softened
2 1/2 cups (312.5 grams/ 11.02 oz) powdered sugar
7/8 cup egg whites (from about 6 eggs)
2 tablespoons vanilla extract
2 tablespoons lemon extract
1 1/2 cups (187.5grams/ 6.61 oz) all purpose flour

Cookie filling:
1/2 cup heavy cream
8 ounces semisweet chocolate, chopped
1 orange, zested

1. In a mixer with paddle attachment cream the butter and the sugar.

2. Add the egg whites gradually and then mix in the vanilla and lemon extracts.

3. Add the flour and mix until just well mixed.

4. With a small (1/4-inch) plain tip, pipe 1-inch sections of batter onto a parchment-lined sheet pan, spacing them 2 inches apart as they spread.

5. Bake in a preheated 350 degree oven for 10 minutes or until light golden brown around the edges. Let cool on the pan.

6. While waiting for the cookies to cool, in a small saucepan over medium flame, scald cream.

7. Pour hot cream over chocolate in a bowl, whisk to melt chocolate, add zest and blend well.

8. Set aside to cool (the mixture will thicken as it cools).

9. Spread a thin amount of the filling onto the flat side of a cookie while the filling is still soft and press the flat side of a second cookie on top.

10. Repeat with the remainder of the cookies.

Milano Cookie
Blog Signature

Saturday 25 July 2009

Our First Eggs.

First Eggs

"I can't find the hen," hubby said worriedly to me yesterday morning. "But I haven't heard any commotion or anything. Unless maybe she's laying?" And he was right. She has started to lay again after having her chicks and these are our first eggs. She had found herself a cosy little nook down the field to lay.

Now the only question is, "What to bake with them?"
Blog Signature

Wednesday 22 July 2009

Hokey Pokey Ice-cream

I may never buy ice-cream again. Well, honeycomb ice-cream anyway. This is gorgeous. So rich and loaded with honeycomb in every mouthful.

I'm not a huge ice-cream fan. Yes, I always have it in the freezer but its always relatively inexpensive stuff to accompany dessert. I would never dream of sitting down to a bowl of ice-cream as dessert. For that reason I have always skimmed over ice-cream recipes in books. Most of them require copious amounts of egg yolks and a lot of time and effort. So for someone who wasn't a big fan it was too expensive and energy-consuming given that I don't have an ice-cream maker.

However, in my latest edition of delicious the Hokey-Pokey ice-cream caught my eye and I logged it into the might-give-it-a-go catalogue in the back of my mind. And that was that. Then a week or two later I made a recipe that require 6 egg whites. And since I had put all the yolks into the same bowl they had sort of merged into one big orange gloop. What on earth would I do with six egg yolks? And then that little flash bulb lit up and I ran to check the ingredients for the Hokey Pokey ice-cream. Guess what - 6 egg yolks!

Like most terrifying culinary activities, this did not live up to my expected level of difficulty. The hokey pokey (what I call honeycomb but it is NOT comb honey nor even made with honey) can be made in advance and stored in an airtight container (which is what I did). Then you take 15mins out of your day to make the custard which sits in the fridge until the next day. On the day you freeze it the only real difficulty is that you are about (which is what I usually am) to give it a stir every hour or so.

Hokey Pokey Ice-cream

Ingredients:

Ice-cream:
750ml whole milk
450ml whipping cream
6 large free-range egg yolks
100g caster sugar
Hokey-Pokey
butter, for greasing
250g caster sugar
125g golden syrup
1tbsp bicarbonate of soda

Method:

For the Honeycomb (Hokey Pokey):
Note: I made this 2 days in advance but you could make it the same day as the ice-cream in between setting stages.

1. Line a shallow baking try with baking paper and butter it well. Set aside.

2. Put the caster sugar and the golden syrup into a large, shallow pan, and heat gently stirring as you go, until everything is dissolved. Turn up the heat and bring to the boil, then reduce the heat and let it simmer for 5 minutes until it starts to turn a light caramel colour. Stir in the bicarbonate of soda. The mixture will bubble and slowly rise to the top of the pan.

3. Pour the honeycomb onto the baking tray and allow it to cool completely and harden. This will take an hour or so. At this point, bash the honeycomb carefully into chunks with a rolling pin. Put it into an airtight container until needed.

For the ice-cream:

1. Heat the milk and cream in a pan to just below boiling point. Remove and set aside.

2. In a bowl, beat the egg yolks with the sugar. Add the warm milk, stirring, and return the custard to a clean pan. Heat gently, stirring all the time, until it begins to thicken and coat the back of a spoon. You should be able to run your finger down the spoon and leave a track. DO NOT LET IT BOIL - the eggs will scramble.

3. Turn off the heat and continue whisking the custard for a few minutes to remove some heat, then transfer to a container, and place in an ice bath (or a sink of very cold water as in my case), in order to cool the custard as quickly as possible.

4. Once the custard is cool, cover the top of it with cling film (to prevent a skin forming) and chill it for a minimum of 4 hours or overnight.

5. Churn the custard in an ice-cream machine*, if you're lucky enough to have one, until almost firm.

6. When the ice-cream is almost firm, add the honeycomb, and keep churning until it is firm (or if you're not using an ice-cream maker, add the honeycomb, stir to mix and return to the freezer.

7. Store in a sealed container, covered with baking parchment in the freezer. Freeze until needed


*If you don't have an ice-cream machine (like me) place the ice-cream mixture into a sealed container and put it into the coldest part of the freezer (if you know where that is). After 1-1.5 hrs, remove the container and beat with a fork or electric whisk (WARNING: this can be messy - I learned the hard way) to make a uniform slush. Return to the freezer and repeat this proces twice, at intervals of 1-1.5hrs. After it has been beaten 3 times, return to the freezer for a further hour and it should then be ready. Mine actually took longer than this but I reckon it had something to do with my tightly packed freezer.

Blog Signature

Monday 20 July 2009

Raspberry Ripple Cheesecake Muffins

I love the way recipes bounce from one blog to another each time with the blogger's adaptions made to it. As Nigella Lawson puts it, "All my recipes are refracted through the prism of my own tastes and prejudices." I picked up this recipe on Granny's blog and she had got it from Rosie's.

The first time I tried it I was a bit disappointed. I was contemplating making the muffins one Saturday when my mother-in-law sent up a box of reduced-price raspberries so it seemed just perfect to make them with raspberries instead of Strawberries. However, I wasn't that enamoured by the pocket of cheese or the baked fruit. That's when I started to toy with the idea of mixing the cream cheese and raspberry throughout the mix and replacing the raspberries with raspberry jam to facilitate this (I had recently made some soft-set raspberry jam which would be perfect).

I also have one important rule when making muffins - use yoghurt!

Success! For me, these adaptations made all the difference. Enjoy.

Raspberry Ripple Cheesecake Muffins

Ingredients:
350g (12oz) plain flour
1 1/2 tbsp baking powder
115g (4oz) castor sugar
1/2 tsp salt
2 eggs
250ml (9fl oz) natural yoghurt
75g (3oz) butter, melted

Filling:
175g (6oz) soft cheese
3tbsp caster sugar
6 tblsp soft-set raspberry jam

Method:

Preheat the oven to 200°C/fan oven 180°C/400°F/gas Mark 6.

Sift the flour and baking powder into a large bowl, add the sugar and salt and mix through with a wooden spoon or whisk then leave aside.

In another bowl beat the eggs and yoghurt together, and then stir in the melted butter. Make a well in the dry ingredients and pour in the liquid ingredients, now gently mix until everything is incorporated - the mixture will still be lumpy and seem a bit dry. Do not over mix or the muffins will not be light and airy.

Beat (just quickly with a fork) the cream cheese and sugar for the filling together in a small bowl. Pour the cream cheese mixture and the raspberry jam into the bowl of muffin batter. Stir to blend - you want the cheese and raspberr ripple throughout the batter. Fill the muffin cases with the muffin mixture.

Bake in the preheated oven for 20-25 minutes until well risen and golden on top. Leave to cool for 5 minutes before turning out on a wire rack to finish cooling.

P.S. This recipe scales to 6 muffins perfectly.

Wednesday 8 July 2009

Chicken and Cashew Mini Quiches

These are perfect for children....or picnics....or parties. They're so easy and so versatile. And my two men think they're great which is my main concern. They are, in fact, a lazyman's quiche.

The first time I read about these I was kicking myself - why didn't I think of that before? All you do is make up quiche batter, pour it into greased muffin tins and bake. And you have little individual (pastryless) quiches.

Now don't get me wrong, I love pastry, in fact, I think my last supper would involve a tart of some kind, but these are perfect when you don't have the time to make pastry (and aren't organised enough to have a baked pastry shell in the freezer). And if that's not handy enough, you freeze the leftover quiches to be removed and re-heated as an easy lunch/supper some other time.

You could, of course, make these in mini-muffin tins and you would have double the quantity of bite-sized morsels for a party. Adapt the ingredients to suit yourself.

Chicken and Cashew Mini Quiches
(adapted from the book Chocolate&Zucchini)

Ingredients
1 tsp extra virgin olive oil
1 garlic clove minced
150g cooked chicken, chopped
250g cherry tomatoes, deseeded and chopped
3 large eggs
375ml whole milk
90g plain flour
100g cheddar, grated
2 tblsp parsley chopped
90g cashews, chopped
1 red pepper, roasted and chopped (if from a jar use about 80g)

Method:

1. Pre-heat the oven to 220 oC and grease a regular size muffin tin (or a mini-muffin tin in which case you would be able to make two batches) with olive oil (I used garlic oil to add a hint of garlic to the mixture).

2. Whisk the eggs in a large mixing bowl. Add the milk and whisk again. Sift in the flour, season and whisk until blended (the batter will be thin). Add the chicken, cheese, tomatoes, parsley, red pepper and cashews. Stir to blend.

3. Spoon the batter evenly into the prepared tin. You can fill them to the top of each mould as they puff up but do not overflow. Bake for 25-35 mins, depending on the size of your moulds, until golden and puffy. Transfer to a rack to cool for 2 mins. Unmould and serve warm or allow to cool further and serve at room temperature.

Notes:
  • You can make the batter up in advance and leave in the fridge, just be sure to give it a good stir before pouring into the tin.


Blog Signature

Saturday 4 July 2009

Rugelach

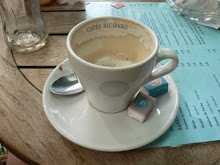
This is what I had for breakfast this morning. Not that anyone really wants to know!

What are they? Rugelach!

Rugelach is a Jewish pastry of Askenazic origin. It looks a bit like a mini chocolate croissant but it doesn't taste like one and if you expect it to then you will be disappointed. It's not as sweet as a chocolate croissant and not flaky at all. The dough can be made with cream cheese, and indeed mine is, but those who want to eat them after meat and keep things Kosher will leave out the cream cheese. I have used yeast in my dough but this is not bread and it does not require kneading. The yeast is just added as an extra ingredient.

My recipe comes courtesy of Nigella Lawson's Feast and are filled with dark chocolate, which was why I was lured to them in the first place, but they can be made with a variety of fillings such as walnuts, raisins, cinnamon etc. The recipe makes 36 but this isn't a problem as you can freeze two thirds of the dough to make another small batch later (which is a very simple thing to do).

RUGELACH

(Nigella Lawson: Feast)

FOR THE DOUGH
425g plain flour
1/4 teaspoon salt
50g caster sugar
1 packet (3 teaspoons) easy-blend yeast, optional
250g cold butter, diced
100g cream cheese, cut or spooned into pieces
1 egg
60ml sour cream

Briefly process the flour, salt and sugar, and yeast if you're using it, just to combine them, and then add the diced butter and cream cheese pieces, and process again until the mixture resembles damp sand.

Beat the egg and sour cream together, and with the engine running, pour down the funnel of the processor. Continue running the motor until it comes together in a silky dough; it will seem like it won't make a dough, but leave the motor running and be patient.

Turn the dough out on to a lightly floured surface, and divide into three, forming each one into a fat disc. Put the discs into freezer bags and leave in the fridge to rest for an hour though you can leave them there for longer - just taking them out about 10-15 minutes before you want to get rolling. (It's at this point that you should put 2 of your 3 discs in the freezer if you want to make them up another day.)

FOR THE FILLING
250g dark chocolate
50g light brown sugar
50g butter

FOR THE EGG WASH
1 egg, beaten with a pinch of caster sugar

FOR THE SUGAR GLAZE
3 tablespoons caster sugar
3 tablespoons boiling water

Preheat the oven to 190C.

Process the chocolate until it's battered into rubble, and then put these dark brown crumbs into a bowl with the sugar, using your fingers to mix them together.

Melt the butter separately and let it cool slightly.

Roll out one of the discs of the dough on a lightly floured surface to a circle 25cm in diameter. With a knife, divide the circle into 12 triangles, like you would divide a pizza, only don't pull apart the triangles yet.Brush the circle of triangles with the melted butter, and then spread or sprinkle a third of the chocolate filling to cover the circle. Then very carefully pull away one triangle at a time, rolling each one up from the thick end to the narrow end to form a bulging curly-whirly crescent; think of a croissant.

Follow this procedure with all the dough discs and their filling.Put the rugelach on to lined baking sheets (if you've used yeast, let stand on the tins as they are for 20 minutes) and brush each one with the egg wash, and bake in the preheated oven for 20 minutes.


When they come out of the oven, browned and puffy, mix the sugar and water together for the glaze, and brush the rugelach with this to make them shiny. Let them cool on a rack.

Blog Signature
P.S. I also had some fruit so it wasn't a completely non-nutritional breakfast!

Wednesday 1 July 2009

Cheese Straws


These are really good.

Don't believe me? Just ask this man -


I set about making these as a snack for him (I'm trying to get more calcium into him via cheese etc). I had these made before I would have even got the length of the shop.

When I first set out blogging food I used to think that I should only blog my own original recipes but I've since laid that notion to rest. First of all, I cook far too many other people's recipes and, secondly, I actually like reading other people's experiences and twists of 'celebrity's' recipes and so must assume others like reading mine.

Here's Debs recipe for Cheese Straws (adapted ever so slightly). She's not a celebrity but she does have some seriously good recipes.

Cheese Straws

1 1/2 cups (about 6 ounces) grated extra-sharp Cheddar cheese
4 tablespoons (1/2 stick or 2 ounces) unsalted butter, softened and cut into 4 pieces
3/4 cup flour, plus more for dusting
1/2 teaspoon sea salt
1/2 teaspoon crushed red pepper flakes
1 tablespoon dbl cream (milk would probably work just as well)

1. Preheat oven to 350°F.

2. In a food processor, combine the cheese, butter, flour, salt and red pepper in five 5-second pulses until the mixture resembles coarse crumbs. Add the half-and-half and process until the dough forms a ball, about 10 seconds.

3. On a lightly floured surface, using a lightly floured rolling pin, roll the dough into an 8- by 10-inch rectangle that is 1/8-inch thick. With a sharp knife (or a pizza or pastry wheel; both worked great), cut the dough into thin 8-inch strips, each 1/4- to 1/3-inch wide (dipping the knife in flour after every few inches ensures a clean cut). Gently transfer the strips to an ungreased cookie sheet (though I lined mine with parchment), leaving at least 1/4-inch between them. The dough may sag or may break occasionally in the transfer, but don’t be concerned — just do your best. The straws can be any length, from 2 to 10 inches.

4. Bake the straws on the middle rack for 12 to 15 minutes, or until the ends are barely browned. Remove from the oven and set the cookie sheet on a rack to cool.

5. Serve at room temperature. (I stored some in an airtight container for eating over the next day or two and bunged the rest in the freezer.)


Blog Signature